Timed Reports with Google Sheets
Here's a step by step walkthrough for setting up timed reports with google sheets in boberdoo. Check out our video below, or you can look at the steps in this walkthrough.
Setting up your boberdoo system to send reports to your Google Sheets will take a few steps to get up and running, as it requires bouncing back and forth in your Google account to get the required items for integrations.

Google Cloud Console Setup
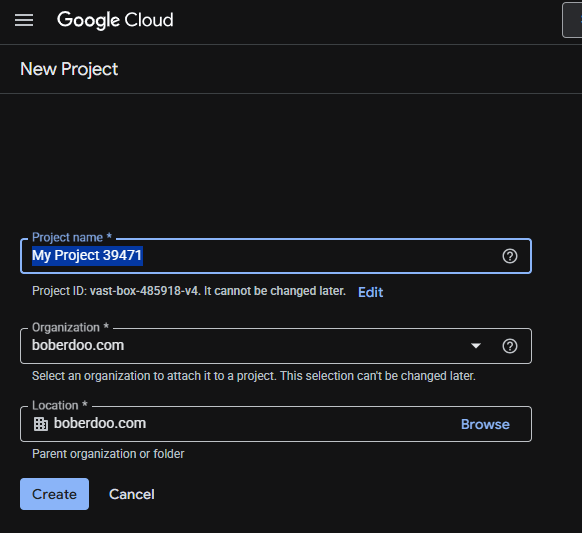
Step 1: Create or Select a Project
Go to https://console.cloud.google.com/
Create a New project, or choose from an existing Project.
Grab the 'Project ID' value (not the Project name!) and paste it into the 'Google Sheet Project ID' field in the Timed Report popup.
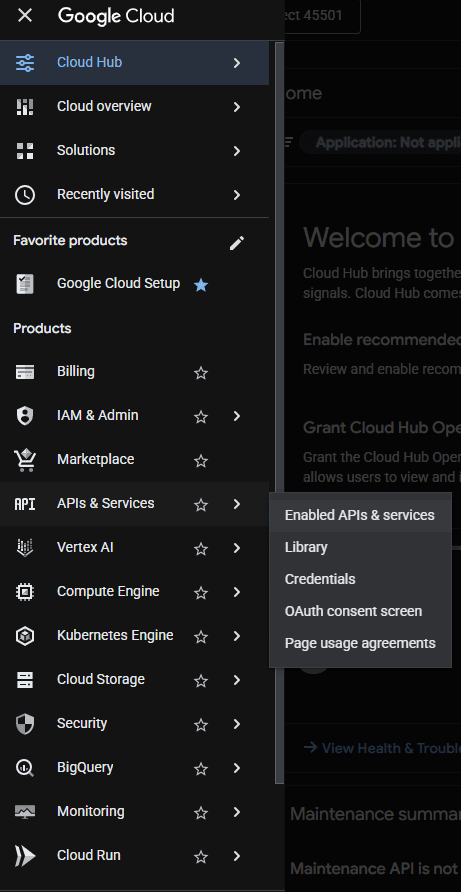
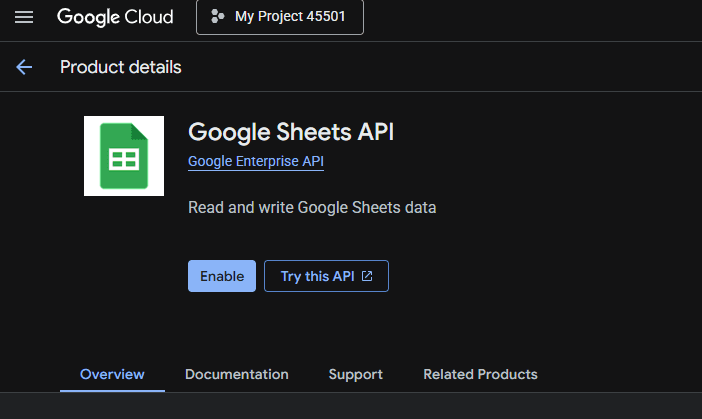
Step 2: Enable the Google Sheets API
Navigate to the left sidebar to find APIs & Services > Enabled APIs & Services.
Then click + Enable APIs and services at the top. Here, you can use the search box to look for Google Sheets, or if you scroll down, it is one of the boxes under Google Workspace. Click Enable.
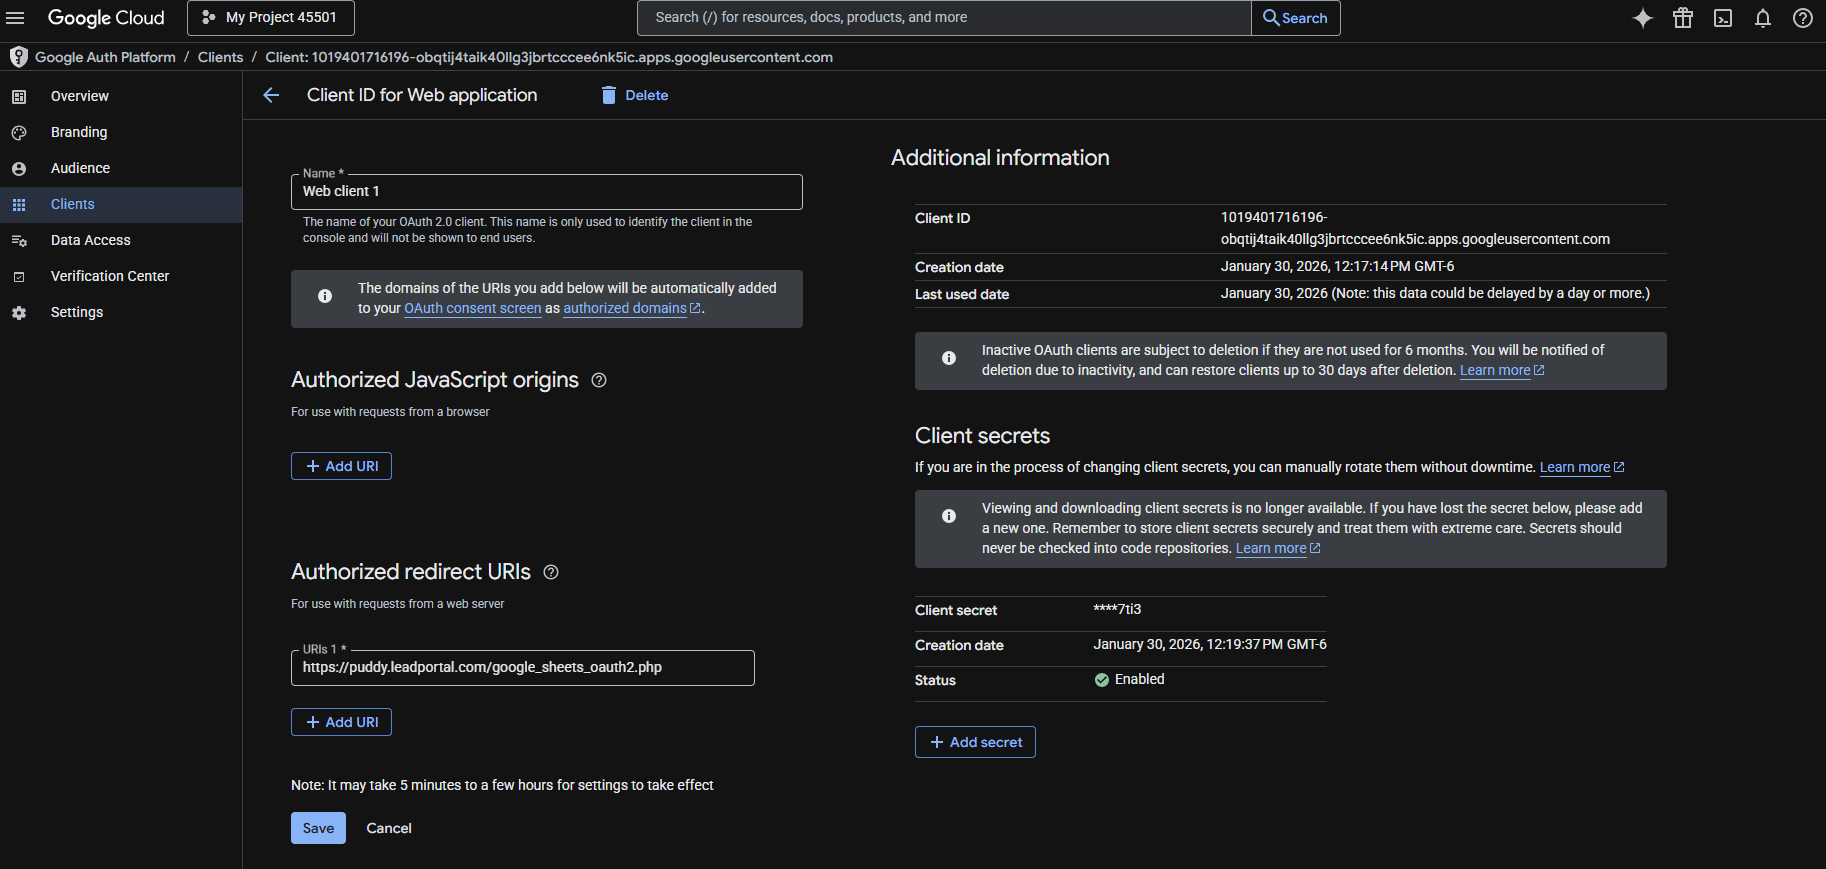
Step 3: Create Credentials
Now you will need to Create Credentials for the Google Sheet. Please note that if you select User data, a User consent section must also be configured.
Make sure to set your custom URL into the 'Authorized redirect URIs' section: https://{yourdomain}.leadportal.com/google_sheets_oauth2.php
Step 4: Copy Client ID and Client Secret
After saving, you can copy and paste the 'Client ID' value from Google into the 'Google Sheet Client ID' field.
Lastly, the 'Client Secret' can be found on the same Client tab, to paste into the 'Google Sheet Client Secret' field.
Step 5: Authorize and Complete
This will make your login to your google account to authorize the setup. Once that is done, you are all set and ready to deliver the report to your Google Drive!
*Please note that if google changes anything in the future, these steps may be a bit off. If you run into any issues with the setup, please contact the helpdesk.

Ready To Get Started?
Fill out the form below to schedule a demo with one of our lead distribution experts.