API Keys
boberdoo has decoupled API Keys from individual users, aligning with how companies actually use them in practice. Previously, individual users managed their own keys, which created problems when employees left or roles changed. The new system allows you to create API keys for specific purposes with limited permissions, giving you full control over access and security.
We recommend restricting each key to only the functions it needs, locking it down to specific IP addresses and limiting it to allowed countries for maximum security.
How To Access API Keys
Finding API Keys in Your System
To locate your API Keys, navigate to the Settings tab in your boberdoo system. From there, click the API Keys subtab to view, edit, copy and review the history of all your existing keys.
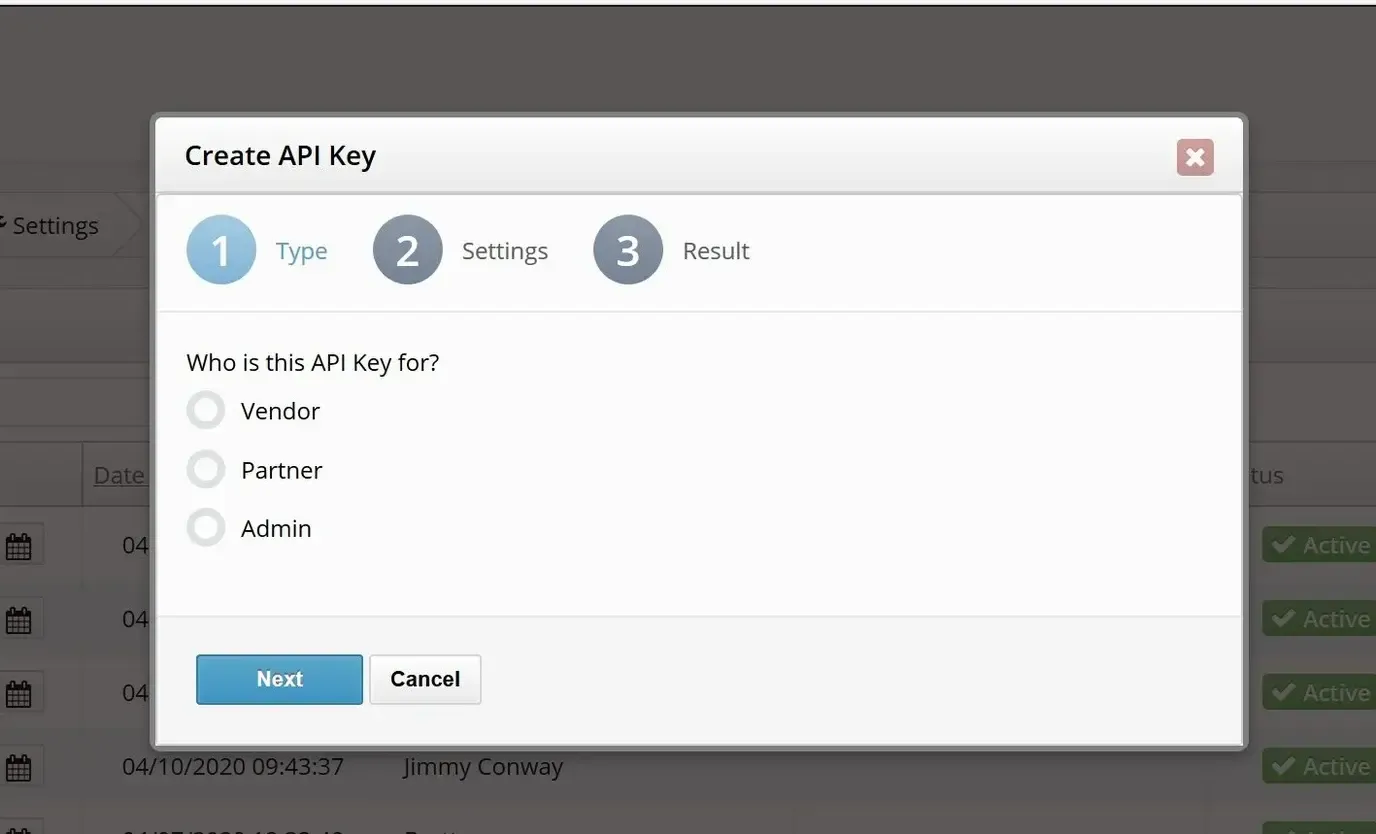
Creating a New API Key
Click the Add New API Key button to launch the creation wizard. The wizard will walk you through setting a name, selecting permissions, configuring IP restrictions and setting an expiration date. Each key can be scoped to only the specific API functions your integration requires.
Managing Existing Keys
From the API Keys subtab, you can activate or deactivate any key at any time. Monitor expiration dates to ensure active integrations are not interrupted. You can also view the full history of changes made to each key for auditing purposes.
What Else Can You Do With API Keys?
Change API Keys
Need to rotate or update an existing key? Visit our guide on how to change API keys for step-by-step instructions on generating a replacement key without disrupting your active integrations.
Whitelist Restricted APIs
For enhanced security, you can whitelist specific APIs that each key is allowed to access. See our guide on whitelisting restricted APIs to learn how to configure granular access controls for each key.
Monitor API Key Usage
Track how your API keys are being used by selecting the Usage button in the API Keys subtab under Settings. The usage report shows request volumes, timestamps and endpoint activity so you can identify unusual patterns or optimize your integrations.
Security Best Practices
Always follow the principle of least privilege when configuring API keys. Restrict each key to only the endpoints it needs, set IP address allowlists, limit geographic access and configure expiration dates. Regularly audit and rotate keys to maintain strong security posture.
Ready To Get Started?
Fill out the form below to schedule a demo with one of our lead distribution experts.